# 인기 절정 신상 특가
## **특가 안내 캠페인**
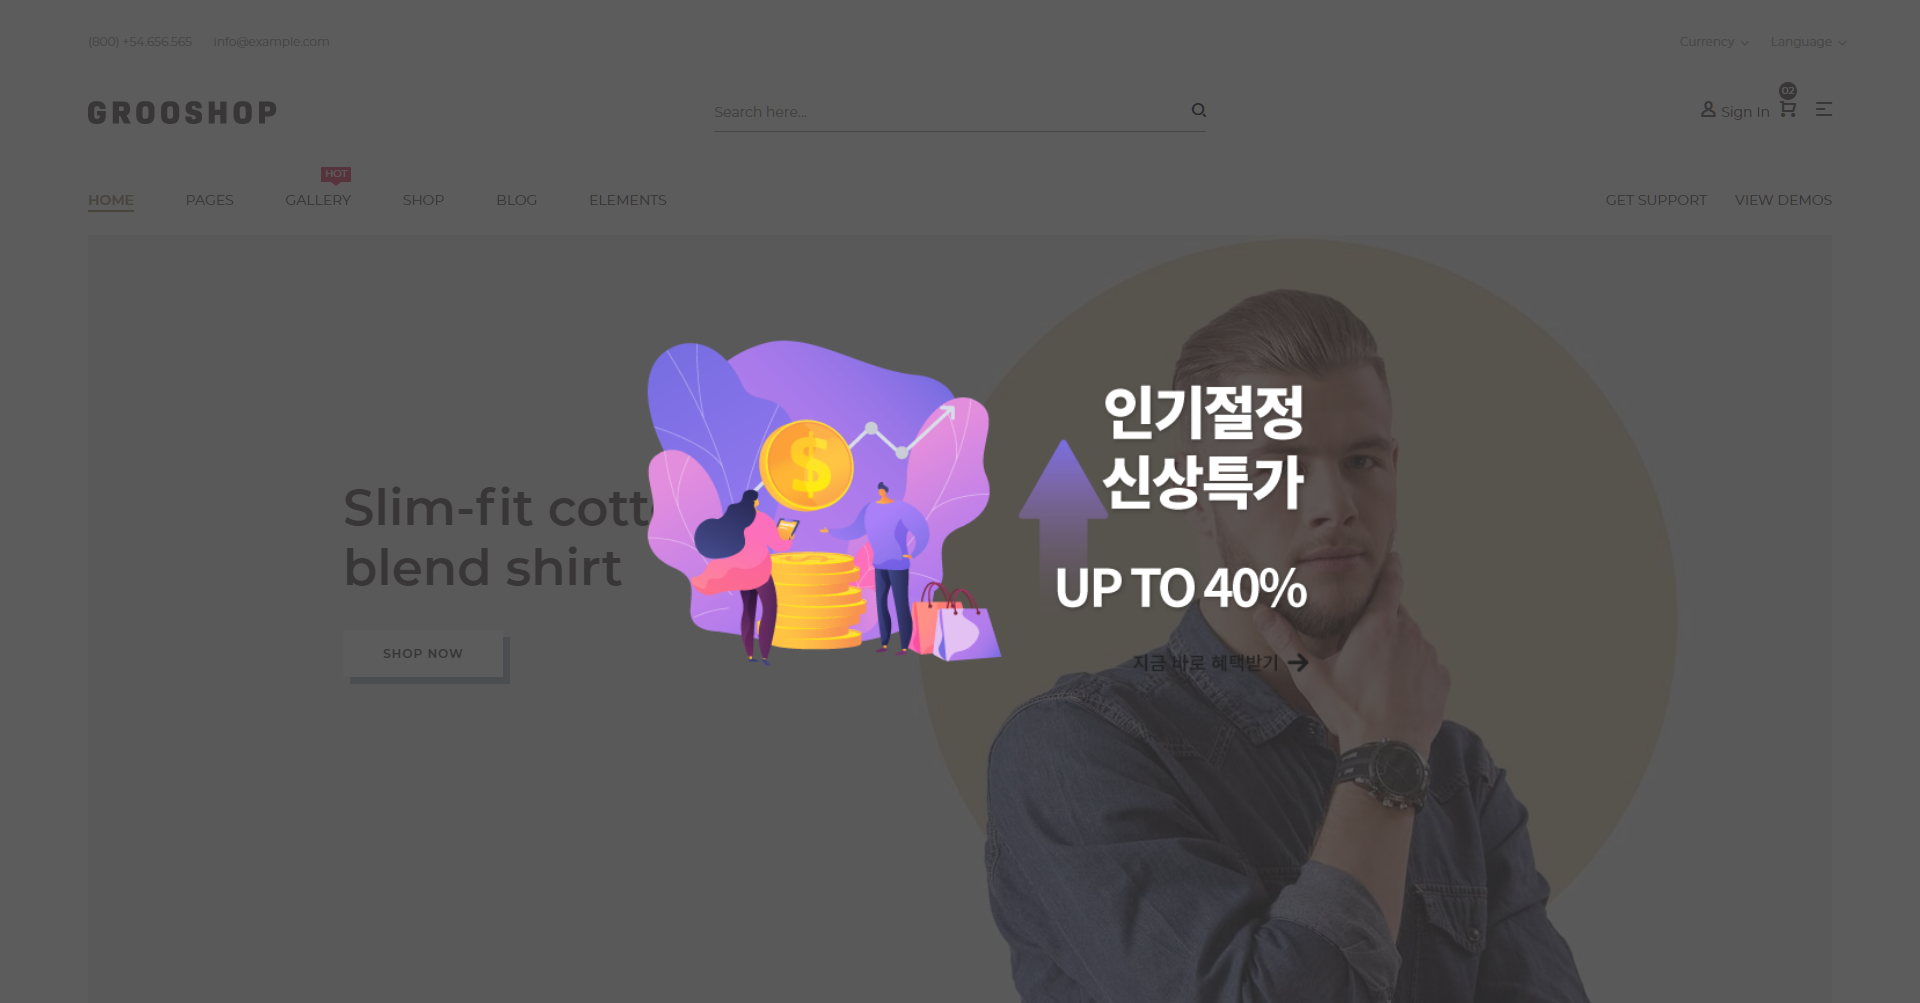
주문 이력을 가진 고객에게 특가 상품 리스트를 노출로 할인 혜택이 쿠폰이나 적립금 형태로 지급하여 구매를 유도하거나, 행사 기간에 재방문 할 수 있도록 메시지를 노출하는 캠페인 입니다.
예시 화면
\
***
## 캠페인 만들기
아래 가이드를 따라 캠페인을 만들어 보세요.
세그먼트 타겟팅 > 세그먼트 관리 > 새로운 세그먼트 만들기로 '구매 이력이 있는 재방문자'를 먼저 만드셔야 합니다.
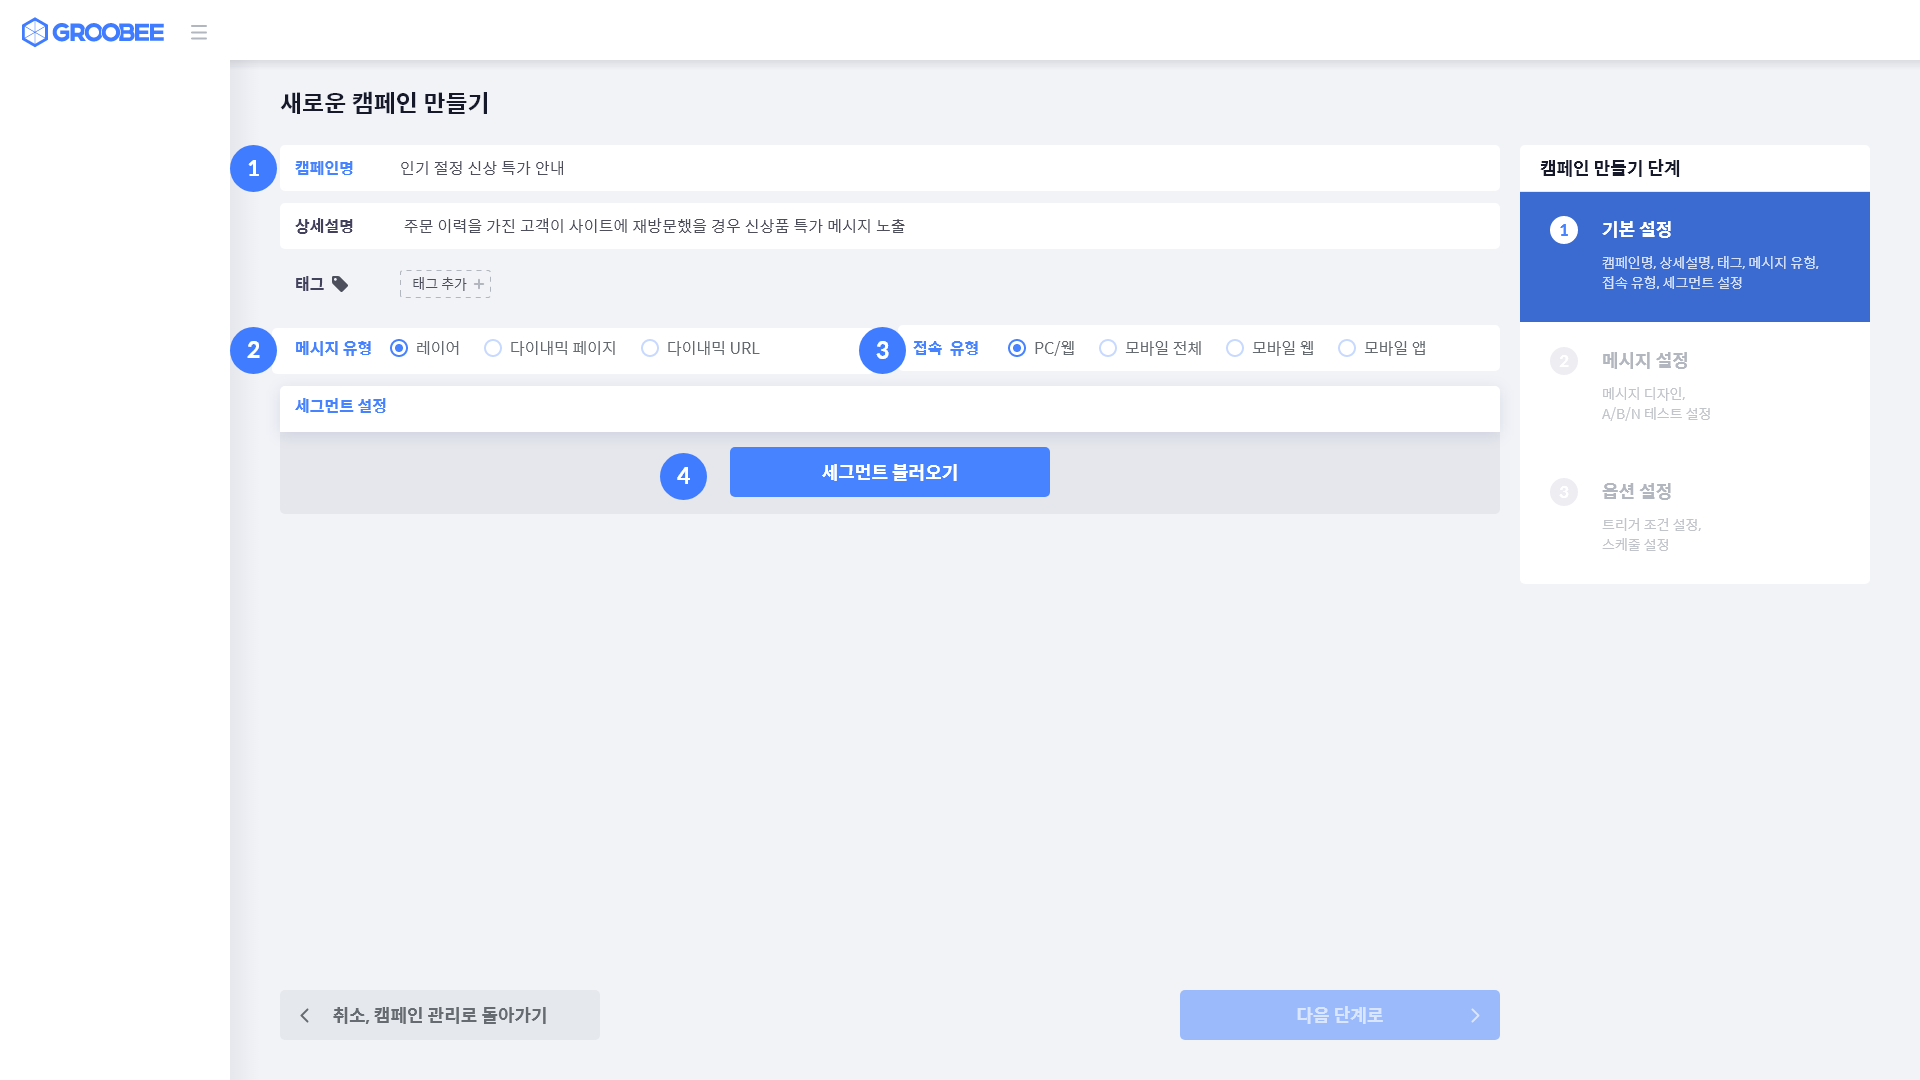
### **Step 1 기본 설정**
예시) 주문 이력을 가진 고객이 사이트에 재방문했을 경우 신상품 특가 메시지 노출
1. 캠페인 명 : 신상 특가 안내
2. 메시지 유형 : 레이어
3. 접속 유형 : PC/웹
4. 세그먼트 불러오기 : 구매 이력이 있는 재방문자
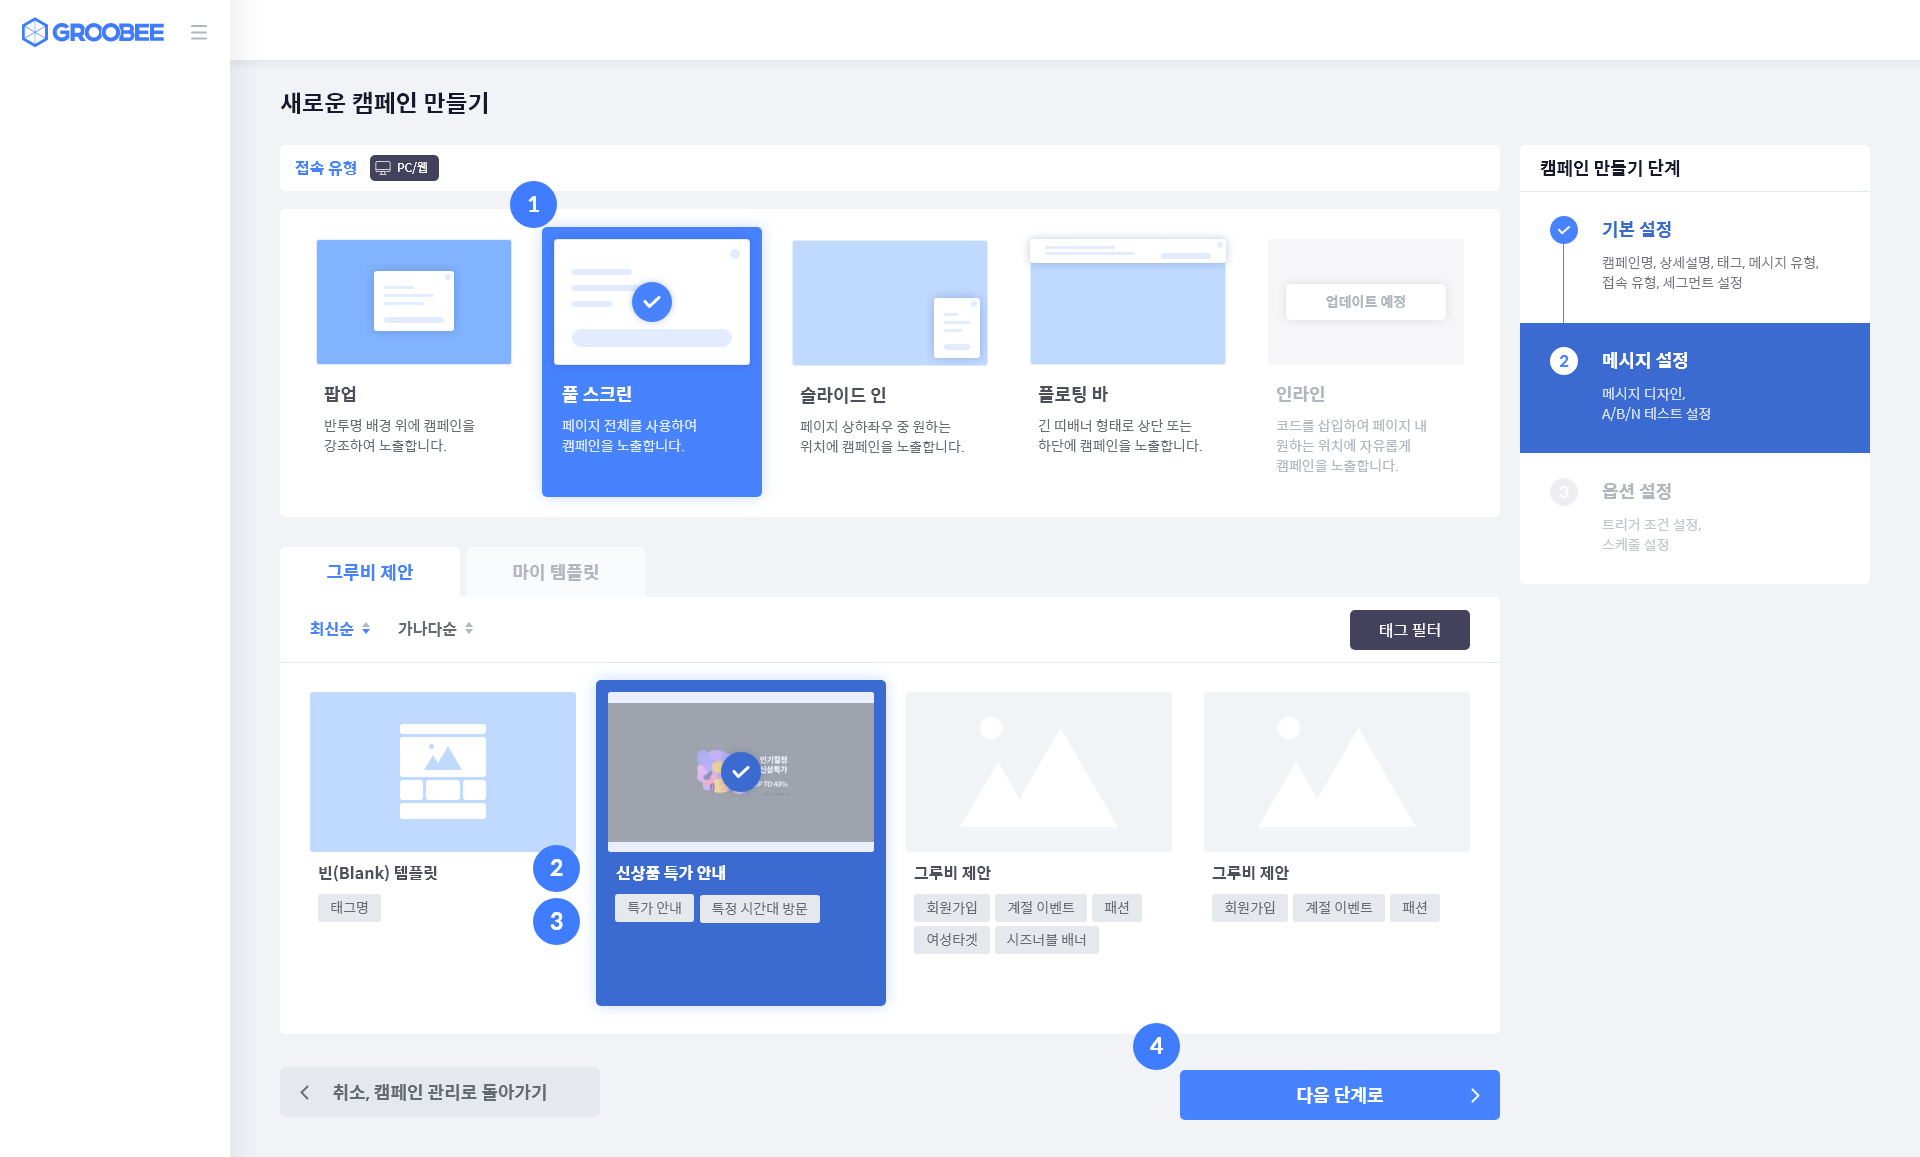
### **Step 2 메시지 설정 > 메시지 디자인**
템플릿 유형을 선택하고 템플릿 리스트 > 그루비 제안의 ‘신상품 특가 안내’ 배너를 선택합니다.
1. 메시지 디자인 : 풀 스크린
2. 배너 명 : 신상품 특가 안내
3. 배너 태그 : 특가 안내
4. 템플릿 선택 후 \[다음 단계로] 버튼을 클릭하여 에디터에서 노출 위치 및 문구 상세 편집
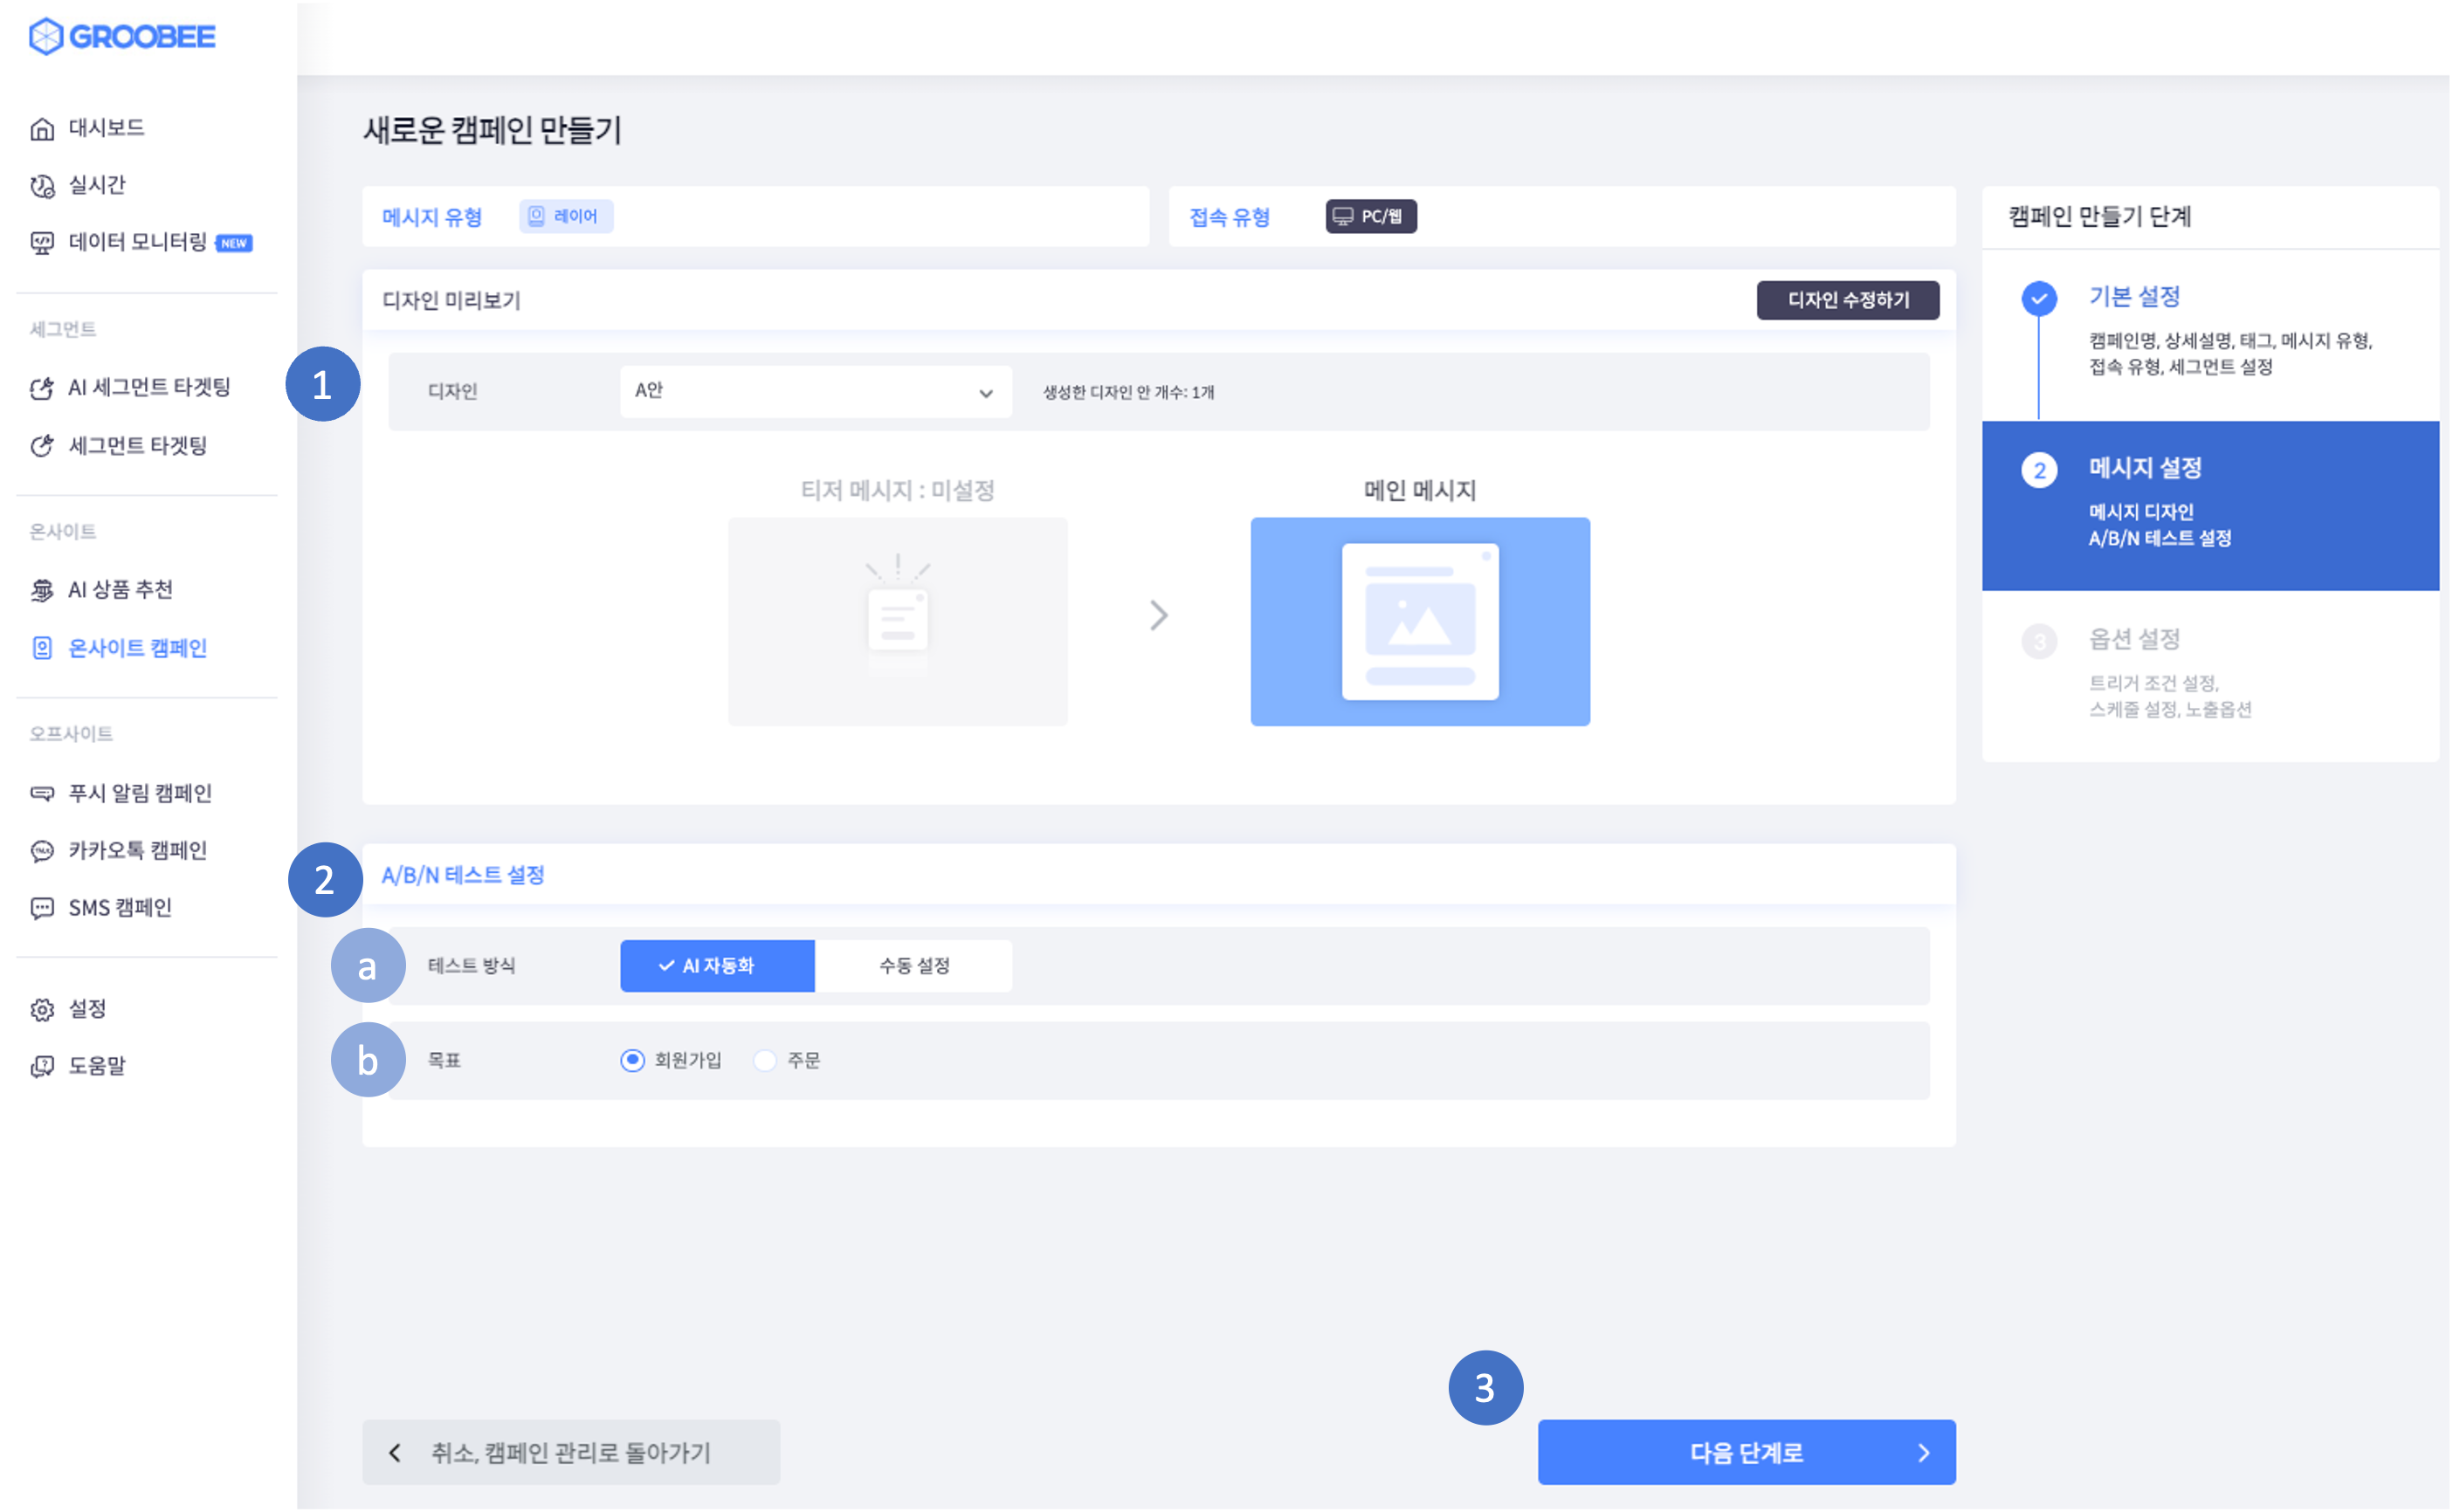
### **Step 2 메시지 설정 > A/B/N 테스트 설정**
메인 메시지의 노출 위치를 설정하고, 노출 비율 방식을 선택할 수 있습니다.
1. 디자인 A안 > 메인메시지 : 설정 확인
2. A/B/N 테스트 설정
1. 테스트 방식 : AI 자동화
2. 목표 : 주문트래픽이 많지 않은 경우에는 수동 설정으로 디자인 안들의 비율을 직접 입력하는 방법이 좋습니다.
3. 다음 단계로
### **Step 3 메시지 설정**
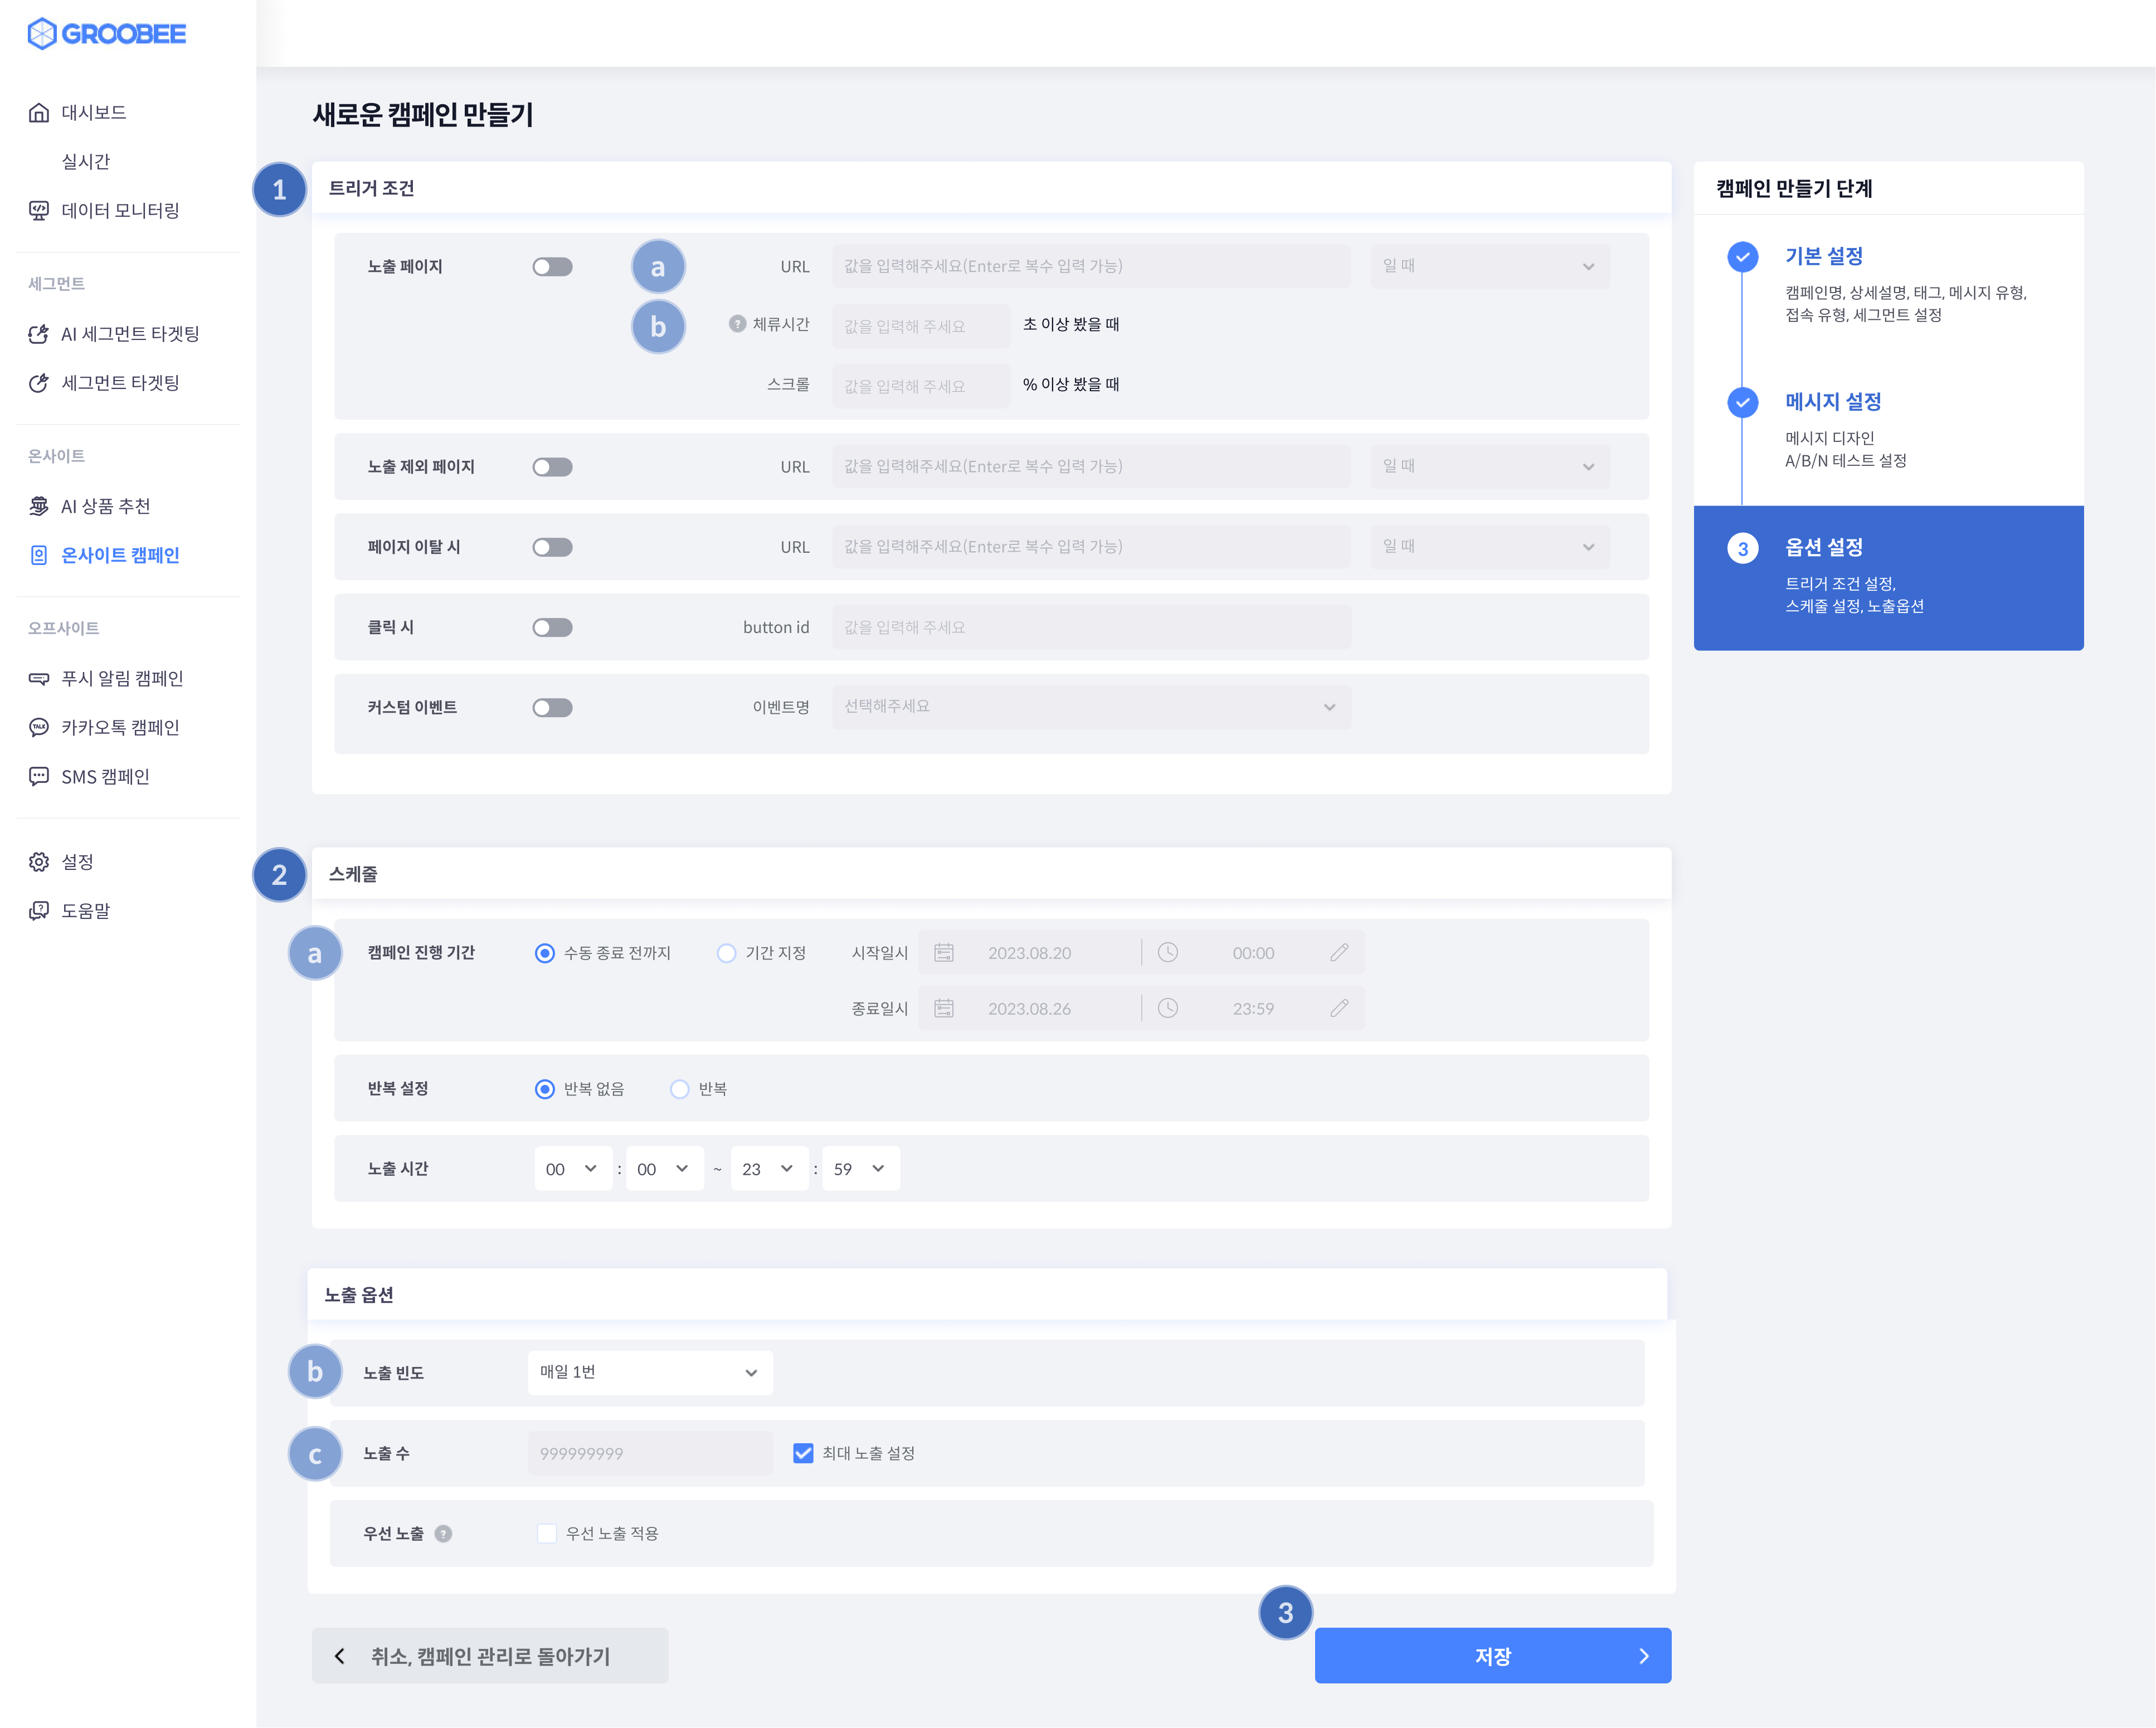
캠페인 만들기의 마지막 단계로 트리거 조건, 스케줄을 설정할 수 있습니다. 캠페인 만들기 완료 후 만들어진 캠페인은 캠페인 관리에서 확인하실 수 있습니다.
1. 트리거 조건
1. 노출 페이지 URL : 해당 URL은 담당자님께서 직접 입력해 주셔야 하는 부분 입니다. (전체 URL을 입력할 경우 http\://, 포함한 정확한 전체 URL을 작성해주어야 합니다.)
2. 체류시간 : 30초
2. 스케줄
1. 캠페인 진행 기간 : 수동 종료 전 까지
2. 노출 빈도 : 매일 한 번
3. 노출 수 : 최대 노출 설정
3. 저장
---
# Agent Instructions: Querying This Documentation
If you need additional information that is not directly available in this page, you can query the documentation dynamically by asking a question.
Perform an HTTP GET request on the current page URL with the `ask` query parameter:
```
GET https://docs.groobee.ai/old-admin/notes/groobee-suggestion/popular.md?ask=
```
The question should be specific, self-contained, and written in natural language.
The response will contain a direct answer to the question and relevant excerpts and sources from the documentation.
Use this mechanism when the answer is not explicitly present in the current page, you need clarification or additional context, or you want to retrieve related documentation sections.